A Beginner’s Guide to Setting Up a Freshwater Aquarium
Setting up a freshwater aquarium can be a rewarding and educational experience, offering a glimpse into a miniature aquatic ecosystem. For those new to the hobby, the process may seem overwhelming, but with a systematic approach, it becomes manageable and enjoyable. This guide outlines the key steps involved in establishing a freshwater tank, from selecting the right equipment to completing the initial cycling period. By following these guidelines, beginners can create a stable environment that supports the well-being of aquatic life.
Many factors contribute to a successful aquarium setup, including tank size, location, and the choice of filtration and substrate. Each decision influences the overall health of the tank and its inhabitants. Understanding the rationale behind these choices helps new aquarists make informed decisions that align with their goals and circumstances. While no single method guarantees success, a thoughtful and patient approach often leads to a more stable and visually appealing aquarium.
The information provided here is intended for educational purposes and reflects common practices within the freshwater aquarium community in the United States. It is important to recognize that individual results may vary based on water quality, maintenance routines, and other environmental factors. Always consult local aquarium experts or trusted resources for advice tailored to your specific situation.
Selecting the Right Tank and Equipment
The first major decision in setting up a freshwater aquarium is choosing an appropriate tank. Tank size is a critical factor, as larger volumes of water are generally more stable and forgiving of minor fluctuations in water chemistry. Beginners often start with tanks ranging from 10 to 30 gallons, although larger tanks may be easier to maintain in the long run. Consider the available space, the weight of a filled tank, and proximity to electrical outlets and water sources. The location should be away from direct sunlight and drafts to help maintain a consistent temperature.
When selecting a tank, options include glass or acrylic, each with its own advantages. Glass tanks are typically more scratch-resistant and less expensive, while acrylic tanks are lighter and offer clearer visibility. The choice often comes down to personal preference and budget. Along with the tank, essential equipment includes a filter, heater, thermometer, lighting system, and water testing kits. These components work together to create a suitable environment for fish and plants.
Filtration is a cornerstone of aquarium health, as it removes physical debris and supports beneficial bacteria that process waste. There are several types of filters: hang-on-back, canister, sponge, and undergravel. Each has merits and limitations, and the best choice depends on tank size, stocking levels, and maintenance preferences. A heater is necessary for tropical fish, which require stable temperatures between 75°F and 80°F. A reliable thermometer helps monitor temperature, while a testing kit for pH, ammonia, nitrite, and nitrate is indispensable for tracking water quality.
Lighting is another consideration, especially if live plants are part of the plan. Different plants have varying light requirements, so selecting a fixture that matches those needs is important. LED lights are popular for their energy efficiency and adjustable settings. It is also wise to invest in a gravel vacuum, net, and buckets dedicated to aquarium use to avoid contamination from household chemicals.
Choosing and Preparing Substrate
Substrate, the material placed at the bottom of the tank, serves multiple purposes. It provides a surface for beneficial bacteria, anchors plants, and contributes to the aesthetic appeal of the aquarium. Common options include gravel, sand, and specialized plant substrates. Gravel is versatile and easy to clean, making it a popular choice for beginners. Sand offers a natural look and is suitable for bottom-dwelling fish, but it can compact and require occasional stirring to prevent anaerobic pockets.
Specialized plant substrates are designed to release nutrients and support rooted plants. They are often more expensive and may require careful handling to avoid clouding the water. The depth of the substrate layer typically ranges from 2 to 3 inches, providing ample room for plant roots and bacterial colonization. Before adding substrate, it should be rinsed thoroughly to remove dust and debris. This step helps prevent cloudy water when the tank is first filled.
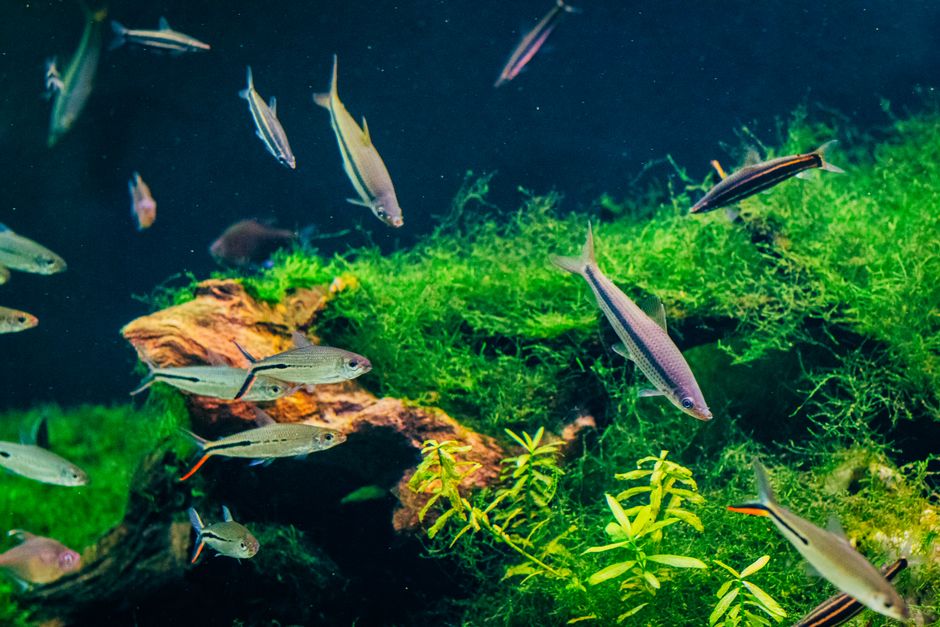
When planning the layout, consider the needs of future inhabitants. Some fish prefer open swimming areas, while others seek hiding spots among rocks or plants. Incorporating driftwood or rocks can create natural territories and enhance the visual appeal. It is important to avoid materials that may leach harmful substances into the water. Researching the suitability of each decoration is a prudent step.
After adding substrate and decorations, the tank can be filled with water. Using a plate or bowl to diffuse the water stream helps minimize disturbance to the substrate. The water should be treated with a conditioner to remove chlorine and chloramine, which are harmful to fish and beneficial bacteria. At this stage, the tank is ready for the cycling process, which establishes the biological filter.
Understanding the Nitrogen Cycle and Cycling Your Tank
The nitrogen cycle is a biological process that converts toxic ammonia into less harmful substances. In a new aquarium, ammonia is produced by fish waste, uneaten food, and decaying organic matter. Beneficial bacteria, primarily Nitrosomonas and Nitrobacter, colonize the filter media and substrate, transforming ammonia into nitrite and then into nitrate. This cycle is essential for a healthy aquarium, as ammonia and nitrite are toxic to fish even at low concentrations.
Cycling a tank involves cultivating these bacteria before adding fish. There are several methods: fishless cycling, which involves adding a source of ammonia without fish; fish-in cycling, which uses hardy fish to produce waste; and using commercial bacterial starters. Fishless cycling is often recommended for beginners because it avoids exposing fish to harmful toxins. The process typically takes four to six weeks, during which ammonia and nitrite levels are monitored regularly.
During cycling, test the water every few days and record the results. Ammonia will initially rise, then fall as nitrite begins to appear. Nitrite will eventually decline as nitrate increases. Once ammonia and nitrite read zero and nitrate is present, the tank is considered cycled. A partial water change may be needed to reduce nitrate levels before adding fish. It is important to note that cycling times vary based on temperature, pH, and other factors. Patience is key.
Some products claim to accelerate the cycling process by introducing live bacteria. While these can be helpful, they do not eliminate the need for monitoring and may not guarantee immediate results. The most reliable approach is to allow the cycle to complete naturally while testing regularly. Once the tank is cycled, fish can be added gradually, one or two species at a time, to avoid overwhelming the biological filter.
First Month Checklist for New Aquarists
The first month of aquarium ownership involves establishing routines and monitoring the tank closely. A checklist can help new hobbyists stay organized and attentive to the needs of the aquarium. Below is a suggested checklist for the initial four weeks, though adjustments may be necessary based on specific tank conditions.
- Week 1: Set up the tank, add substrate, decorations, and water. Install and test all equipment. Begin cycling by adding a source of ammonia (if fishless cycling) or a small number of hardy fish (if fish-in cycling). Test water daily for ammonia, nitrite, and pH.
- Week 2: Continue testing water every other day. Observe the cycling progress. If ammonia or nitrite levels are high, perform a partial water change to dilute toxins. Avoid adding more fish during this period.
- Week 3: Test water every other day. Once ammonia and nitrite drop to zero, check nitrate levels. If nitrate is high, perform a water change. Begin planning the fish stocking list, considering compatibility and tank size.
- Week 4: If the tank is fully cycled, add the first fish gradually. Acclimate them properly by floating the bag and adding tank water slowly. Monitor water parameters daily for the first week after adding fish. Continue regular testing and weekly water changes of 10-20%.
Throughout the first month, keep a log of water test results and maintenance activities. This record helps identify trends and potential issues. Avoid overfeeding, as uneaten food decays and produces ammonia. Feed only what the fish can consume in a few minutes, once or twice a day. Regularly inspect equipment for proper function and clean or replace filter media as needed, following the manufacturer’s instructions.
It is also advisable to research the specific needs of the fish species you plan to keep. Different species have varying requirements for temperature, pH, water hardness, and diet. Joining local aquarium clubs or online forums can provide valuable support and advice from experienced hobbyists. Remember that aquarium keeping is a learning process, and it is normal to encounter challenges along the way.
By following these guidelines, beginners can establish a freshwater aquarium that is both beautiful and healthy for its inhabitants. The key is to proceed slowly, monitor water quality consistently, and make adjustments as needed. With time and experience, the hobby can become a source of lasting enjoyment and fascination.